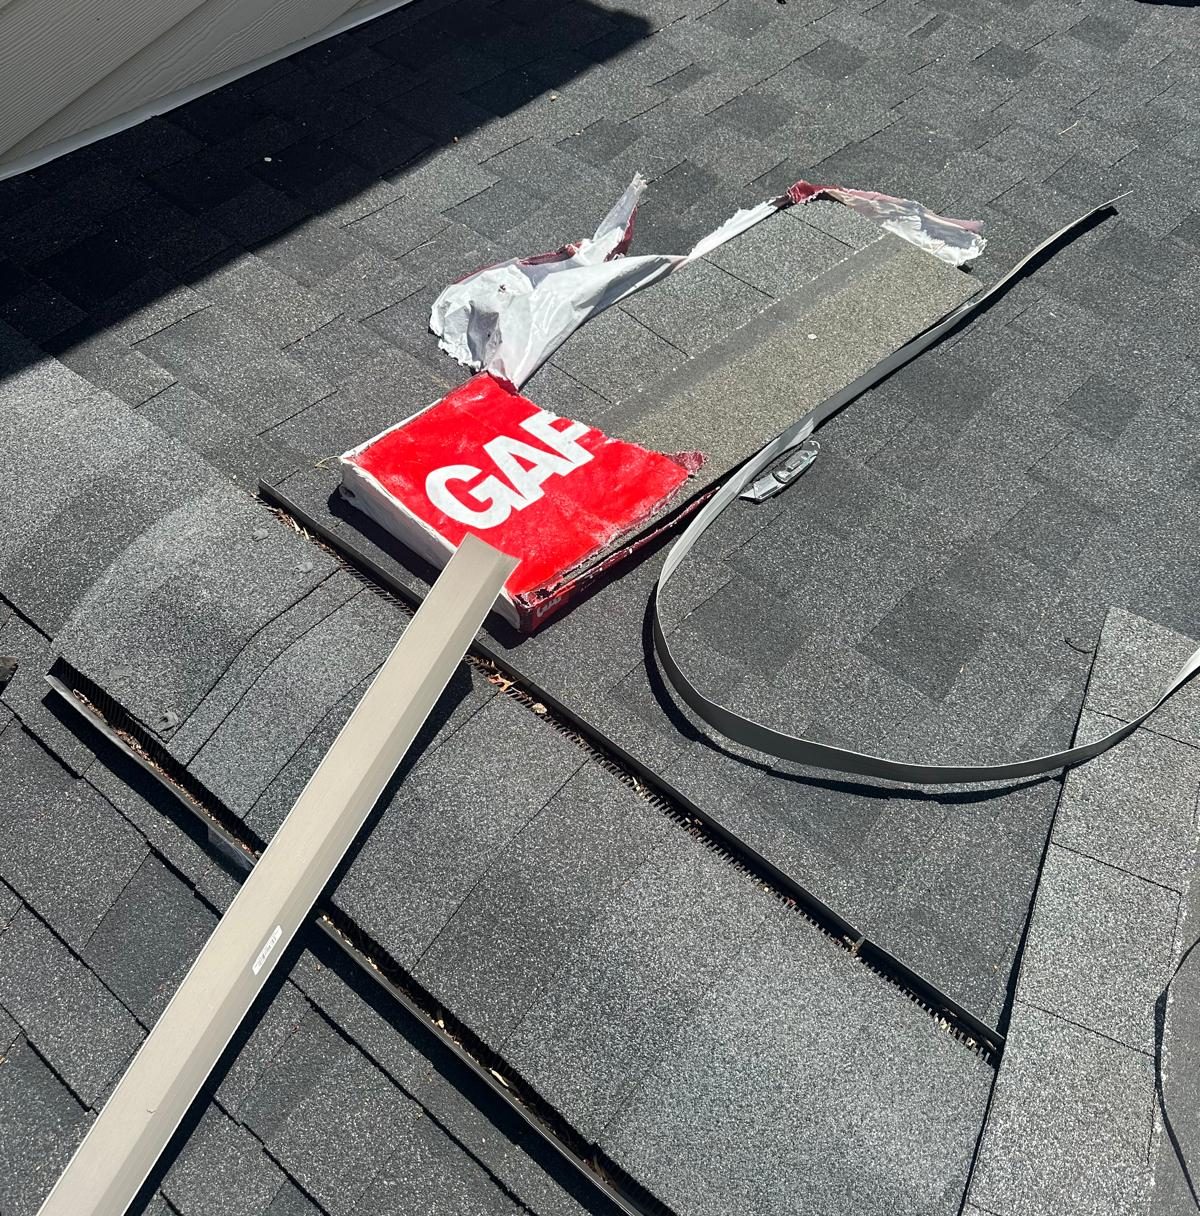
Most roof leaks are not holes in the shingle field. They are failures at penetrations and junctions: chimney flashing, the line where a roof meets a wall, plumbing vent boots, bathroom fan vent caps, and old satellite or cable fixings. Water enters there, travels along sheathing and framing, and shows on a ceiling somewhere else entirely. A roof repair therefore starts with tracing, not patching. Once the entry point is confirmed, shingles are lifted, the flashing is corrected, and the deck beneath is inspected before anything is closed back up.
How to tell where a roof is leaking
The stain inside is where the water gave up, not where it got in. It runs along the underside of sheathing and down rafters before it drops. So the trace runs from the top down:
- Start above the stain and work outward, not straight up. Note the nearest chimney, vent pipe, fan cap, valley, skylight or wall junction uphill of it.
- Check the penetrations before the field. Anything that passes through a roof has a seal, and seals age faster than shingles.
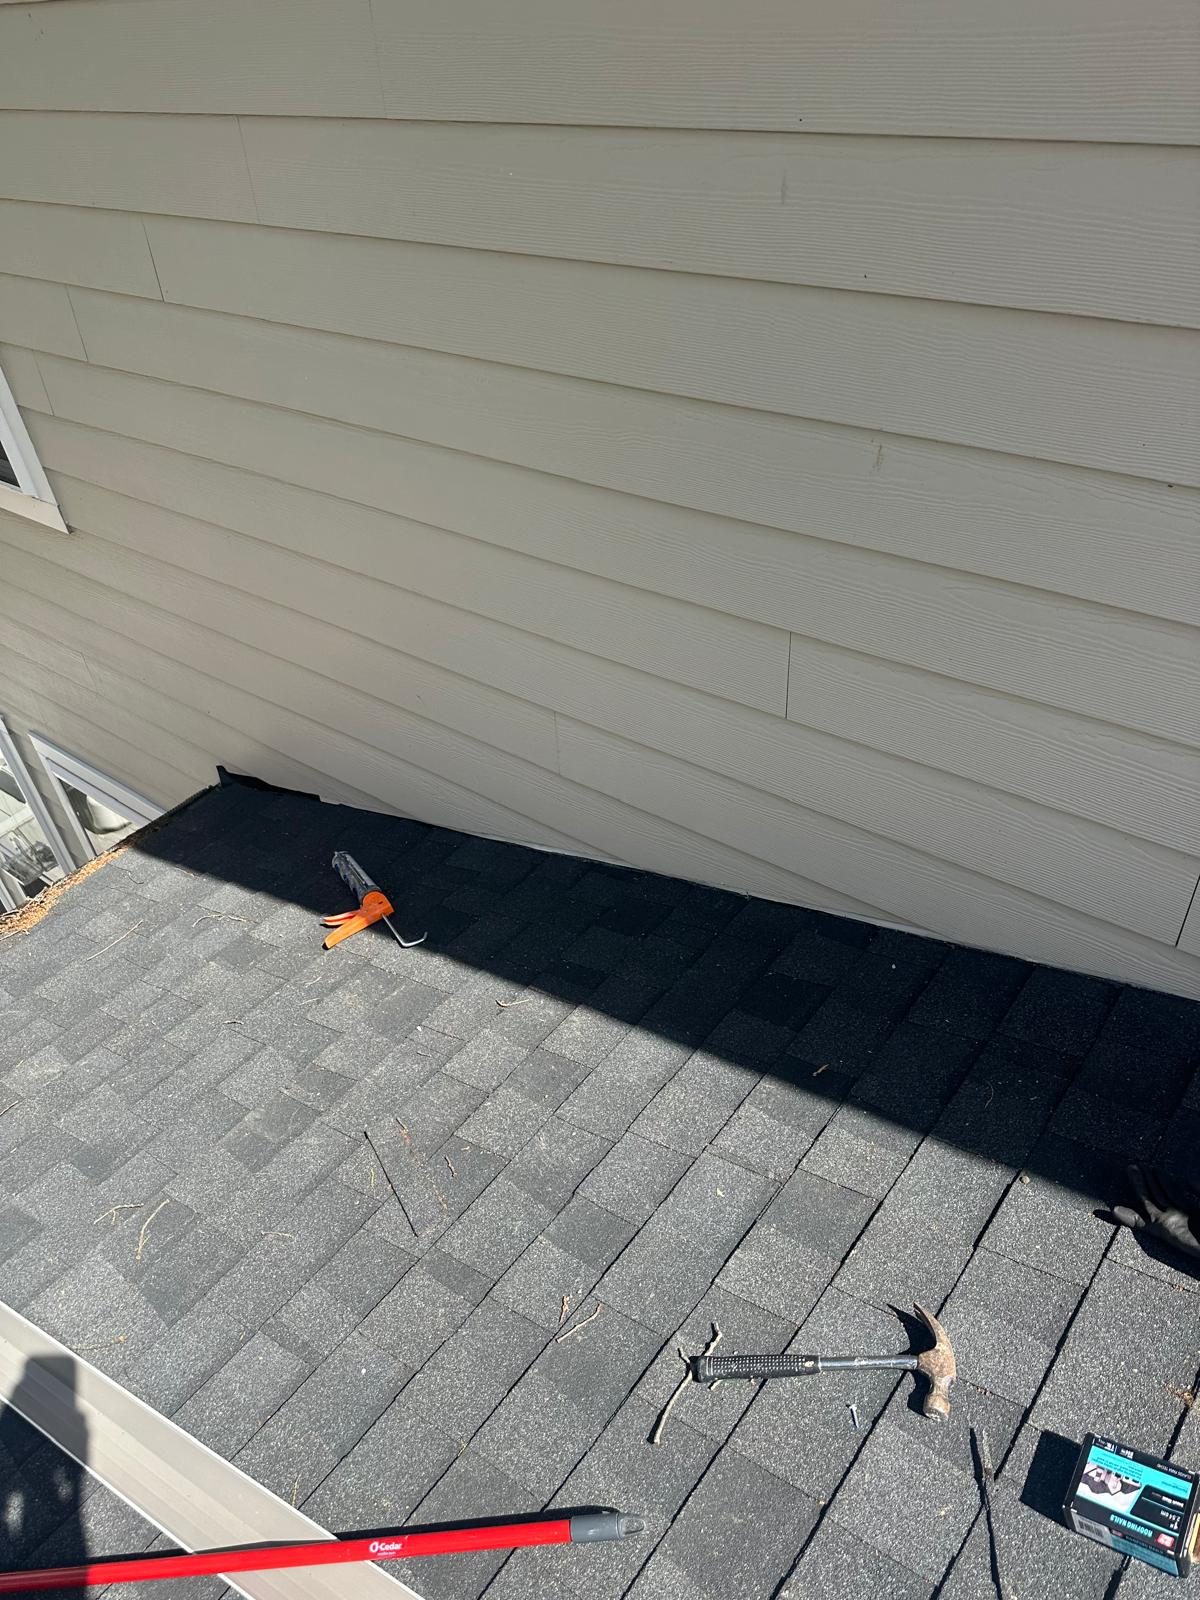
- Check every junction where the roof meets a wall. On one inspection the upper roof and its flashing were in good condition with no cracks at all. The fault was entirely at the lower junction, where the roof met the siding and windows.
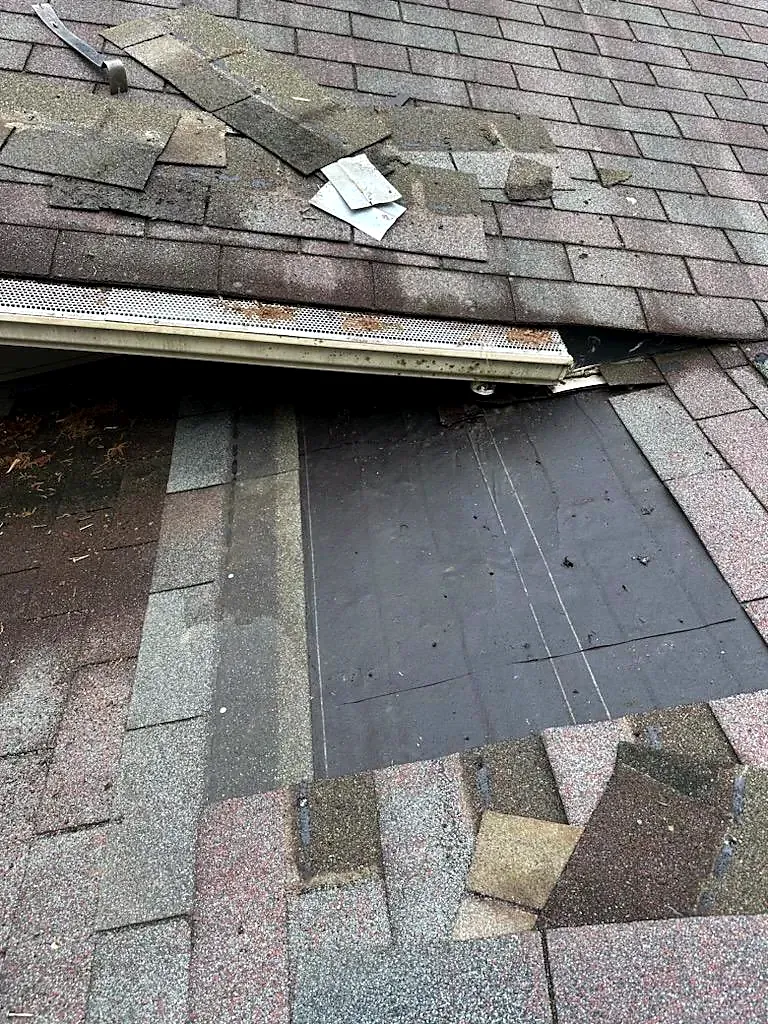
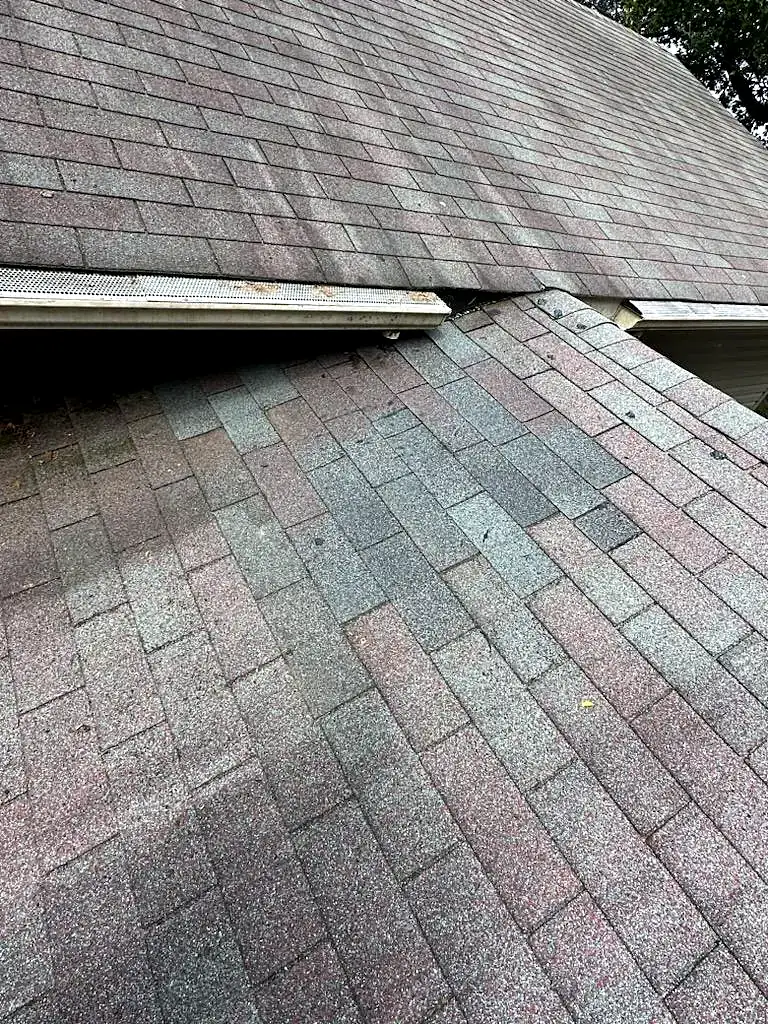
- Look for buckled or lifted shingles, especially near the gutter line. Shingles buckling next to the gutters at the back of a house is a pattern we see repeatedly.
- Look for old fixings. Satellite dishes and cable runs leave holes that are usually covered rather than sealed.
- Open the assembly where the trail is ambiguous. Removing drywall at the wet area and water testing with the cladding off beats guessing and repairing twice.
When we inspect a roof we report what we find and advise you of any further repair needed, in writing, whether or not it is work we were called out for.
Common causes of a roof leak on a Northern Virginia house
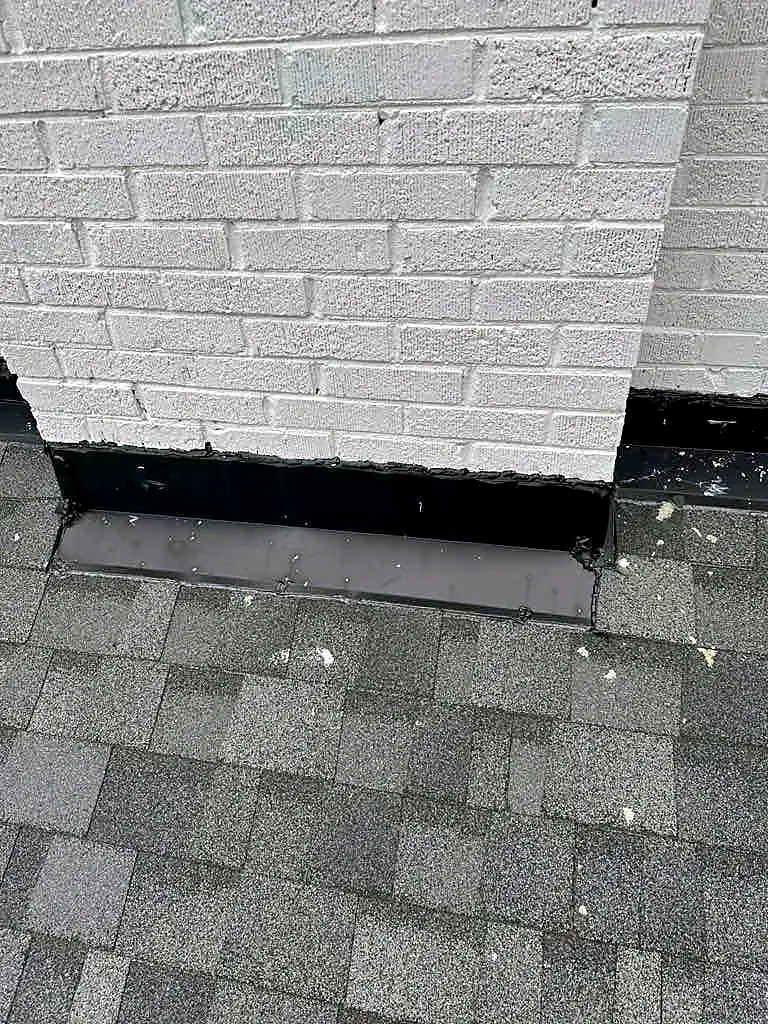
- Failed chimney flashing
- The most frequent single cause on our books. Surface flashing at the chimney flue cracks, lifts or was never sized properly, and water runs straight down the chase into the house. On one property it also rotted the subfloor plywood and weakened the floor joists under the fireplace below.
- Roof-to-wall junctions
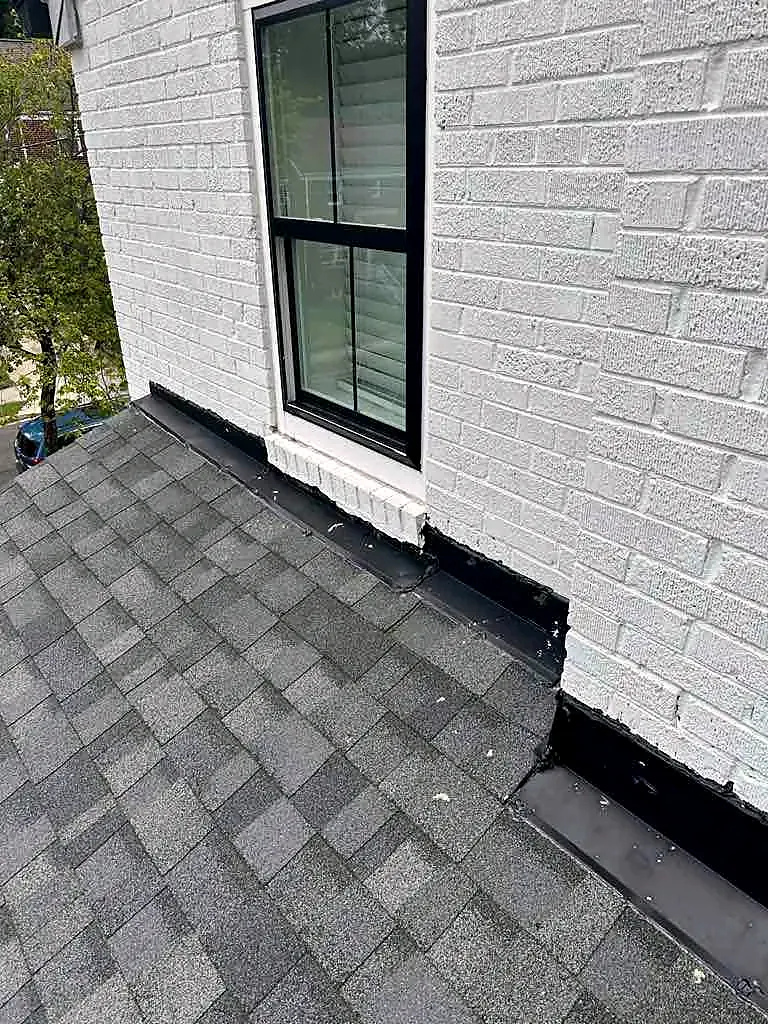
- Where a lower roof — a sunroom, a porch, an addition, a garage — abuts a wall. Failing surface flashing at that junction lets water behind the cladding rather than off the roof, and it shows up above a window or in a ceiling below.
- Plumbing vent boots
- The rubber collar around each stack pipe perishes. Deteriorated two-inch vent pipe boots, combined with shingle damage, produced one of the ceiling leaks we were called to repair.
- Bathroom fan vent caps
- A damaged fan vent cap on the roof is a direct hole. On one call the duct was also holding standing water, so the fan was feeding the leak from inside as well.
- Old satellite and cable penetrations
- Dishes and cable runs bolted through shingles. When they are removed the holes need sealing and the shingles replacing, not covering over.
- Buckling, lifted or damaged shingles
- Sometimes a genuine field failure. A four foot by four foot area of damaged shingles and felt was enough to soak a living room ceiling on one job.
- Missing flashing that was never there
- Not a failure at all — an original omission. No top flashing above a window, or flashing too short to do its job, means the roof has been letting water in since it was built.
Chimney flashing repair and why chimneys leak
A chimney interrupts the roof plane, so every side of it needs a flashing detail and every joint is a candidate for failure. The repair we carry out most often runs like this:
- One to two feet of roof shingles are removed around the chimney flue.
- The existing surface flashing is taken off entirely rather than sealed over.
- Two-foot-wide flashing is installed in its place, with every joint sealed using an exterior water and weather-resistant roof and flashing sealant.
- Remaining holes are filled with silicone roof caulk.
- New shingles are installed where they were removed, color-matched to the existing roof.
- The work area is primed and painted where trim or masonry was disturbed.
Where the chimney meets a gutter as well as the shingle field, both joints are sealed with a black polyurethane flashing sealant. Where the chimney passes through siding, the old caulk is cut out of the vinyl-to-chimney joint on both sides and replaced. A rusting chimney cap gets sanded, primed and painted rather than left to stain the roof below it.
Chimney leaks cause the most hidden damage, because the water runs down inside the chase. On one job the leak had rotted subfloor plywood and compromised the joists beneath a fireplace — those joists were sistered with two by twelve pine, bolted, and new three-quarter-inch subfloor installed. That is a structural repair arising from a roof detail.
Roof-to-wall flashing where the roof meets siding and windows
This is the second great source of roof leaks and the one homeowners least expect, because the roof itself is sound. Water gets behind the wall cladding at the junction and travels down inside.
- Above a window on a side elevation. Trim and siding come off, one to two feet of shingles are lifted, the failed surface flashing is removed, two-foot-wide flashing goes in, joints are sealed and holes filled with silicone roof caulk, and the shingles are matched and replaced.
- Where a sunroom or porch roof abuts the house. Roughly two courses of lap siding are removed along the roof line, the paneling and moisture barrier behind are inspected, and fourteen-inch aluminum flashing is installed so that seven inches lands on the wall and seven inches sits above the roof.
- Where there is no head flashing at all. A top flashing is installed above the window and the perimeter sealed with caulk, sealant and tape, with the flashings against the house extended up to two feet.
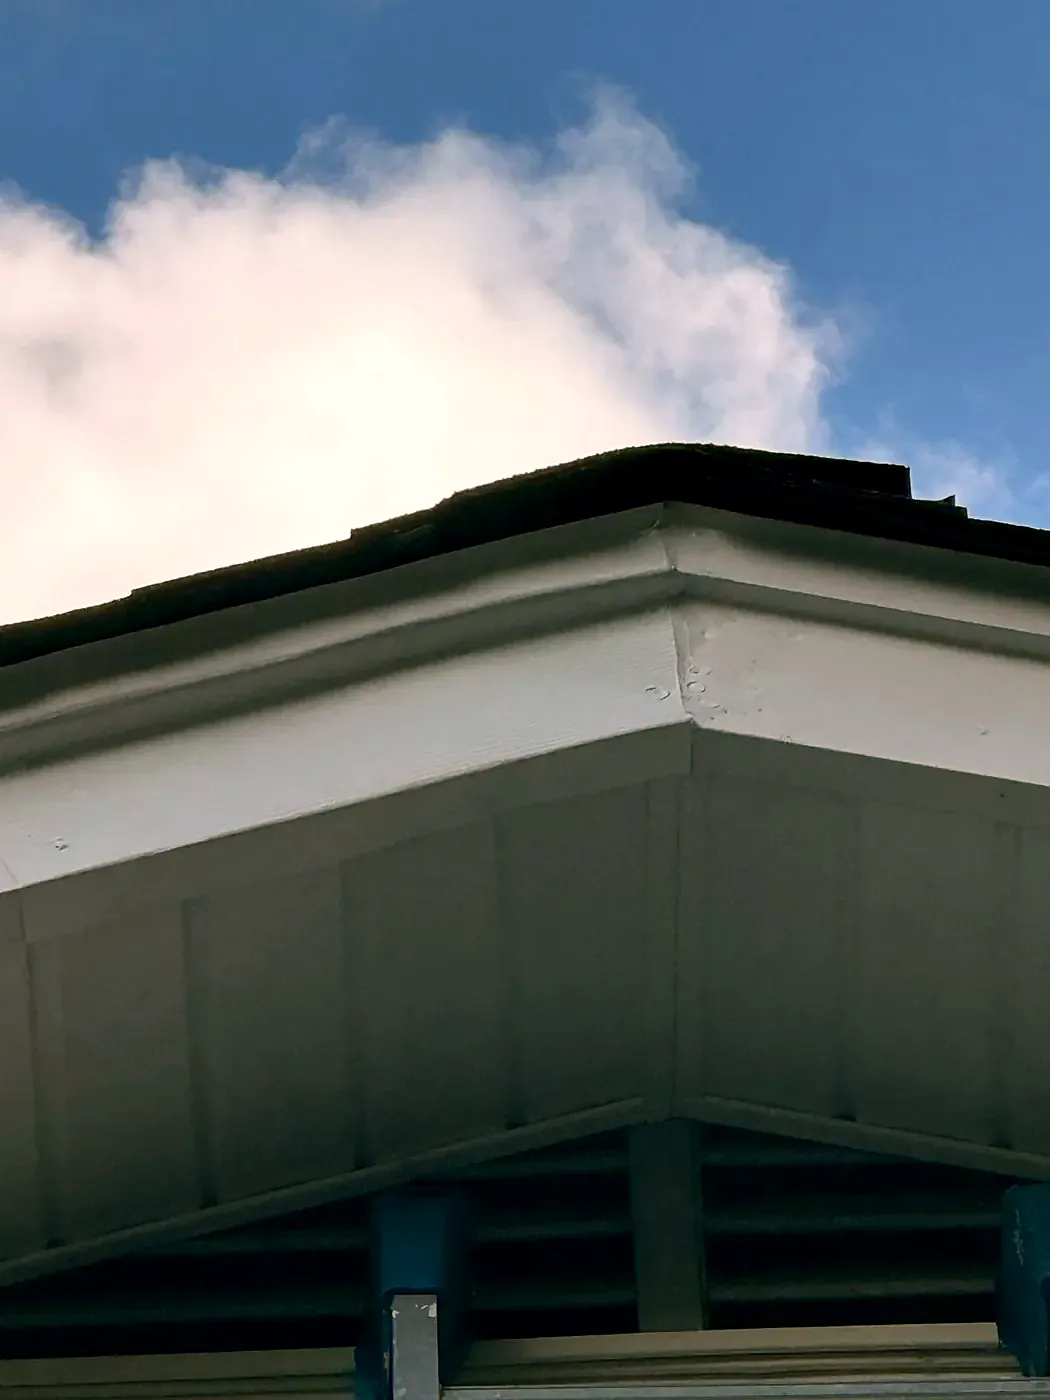
- Where the gutter meets the roof. Missing flashing there is enough to rot a fascia and put water into a ceiling — see gutter repair, cleaning and downspouts.
Because this work always involves removing cladding, it overlaps with siding repair and replacement, and any framing or trim found soft is handled as rotted wood and trim repair.
Shingle repair: damaged, buckling and missing shingles
Field repairs are the smaller half of our roof work, and they are straightforward when the deck below is sound:
- The damaged shingles and the felt beneath them are removed from the work area.
- The plywood under the roof is inspected and you are told if further work is needed before anything goes back.
- New roofing felt is laid in the work area.
- Shingles color-matched to the existing roof are installed — three-tab where that is what is on the house, architectural where the roof is architectural.
- Penetrations in the work area are resealed, and any old satellite or cable holes are sealed rather than covered.
Color matching on an aged roof is never perfect and we do not claim otherwise; a patch stays visible until it weathers in. What matters more is whether the deck under it is sound — if the plywood has gone soft, a patch over it wastes the visit.
Vent boots, fan caps and roof penetrations
Every pipe, duct and fixing through a roof is a managed hole. These are the ones that fail:
| Penetration | How it fails | What the repair involves |
|---|---|---|
| Plumbing stack vent boot | The rubber collar perishes and splits around the pipe | Boot replaced and the pipe resealed; on a full re-roof all stack vent boots are renewed as standard |
| Bathroom exhaust fan vent cap | Cap cracks or is damaged; the duct can hold standing water and add to the problem | Cap and surrounding shingles removed, plywood beneath inspected, new cap fitted, flex pipe reconnected and sealed, cap sealed to the shingles with roof caulk |
| Satellite dish and cable fixings | Bolted straight through the deck and later abandoned | Dishes and cable runs removed from the roof and the side of the house, every hole sealed and shingles replaced |
| Dryer and gable venting | Missing, blocked or vented into the attic | Duct routed correctly and terminated outside; solid four-inch duct specified in place of flexible for fire safety |
| Gable vents | Rotted louvres and failed screens | New vents fitted as close as possible to the existing size, with built-in screens, and the surrounding trim finished |
| Skylights and other openings | Perimeter flashing and seal failure | Treated as a junction repair — flashing lifted and reset rather than sealant applied over the top |
Attic ventilation belongs in this conversation too. A roof with no soffit intake and no ridge exhaust cooks its own shingles and holds moisture in the deck. Where an attic lacks soffit venting we install baffles so insulation cannot block the intake, and ridge venting for exhaust — related to insulation and air sealing.
Roof repair or roof replacement: how to decide
We will repair a roof wherever repairing it is honest, and say so plainly when it is not. It is the question most homeowners are actually asking, so it deserves a blunt answer.
A repair is the right answer when the failure is at a specific detail — a chimney flashing, a roof-to-wall junction, a vent boot, a fan cap, a localized area of damaged shingles — and the rest of the field and the deck are sound. Repairs of that kind are done in a day or two, need no permit, and genuinely solve the problem, because the problem was the detail and not the roof.
Replacement is the right answer when the shingle field is failing generally rather than locally, when felt and flashings are at the end of their life along with the shingles, or when the deck has soft areas across the roof rather than at one point.
What we will not do is sell you a replacement for a flashing failure. On more than one inspection the shingle field and the upper flashing were in good order and the entire fault was a junction detail lower down — that is a repair, and we wrote it up as one.
What a full roof replacement includes
When a roof does need replacing, this is the scope, and it is a full tear-off rather than an overlay:
- Everything around the house, including bushes and plantings, is covered before work starts.
- The existing asphalt shingles, paper, flashing, stack pipe vents, drip edges, metal caps and corner caps are removed and hauled away.
- All damaged plywood beneath is removed and the framing is inspected — you are told what was found.
- Half-inch OSB sheathing is installed where the deck was replaced, glued and screwed.
- New stack vent boots are fitted and new drip edges installed, with all flashings sealed.
- Ice guard membrane is installed against every gutter line, front and back.
- Roofing felt goes down across the deck, then the new shingles — architectural asphalt shingles are our standard.
- An aluminum ridge vent is installed for attic exhaust ventilation.
- The site is cleared and the work is performed to the Virginia building code, with the permit and its processing included where required.
The deck inspection is the part that cannot be priced in advance, and it is why we write it into the scope as an inspection rather than a quantity. Nobody knows how much sheathing is soft until the shingles are off.
What roof repair costs and how we price it
No prices by phone and none published, and we would be cautious of anyone who does quote a roof sight-unseen. A chimney flashing repair, a roof-to-wall rebuild and a tear-off are three completely different jobs that can all present as the same brown stain on a bedroom ceiling.
An estimator comes to the property, inspects the roof and the interior damage, tells you where he believes the water is entering, and gives you a written price before any work starts. On permitted work the permit and processing fees are stated in the contract, and the interior repairs — drywall and ceiling repair and painting — are priced alongside the roof work rather than turning up later.